- Get link
- X
- Other Apps
We now have a butler's pantry - keep scrolling to see this transformation!


The before...we started with basic wire shelving and small appliances on the floor.

Ugh...
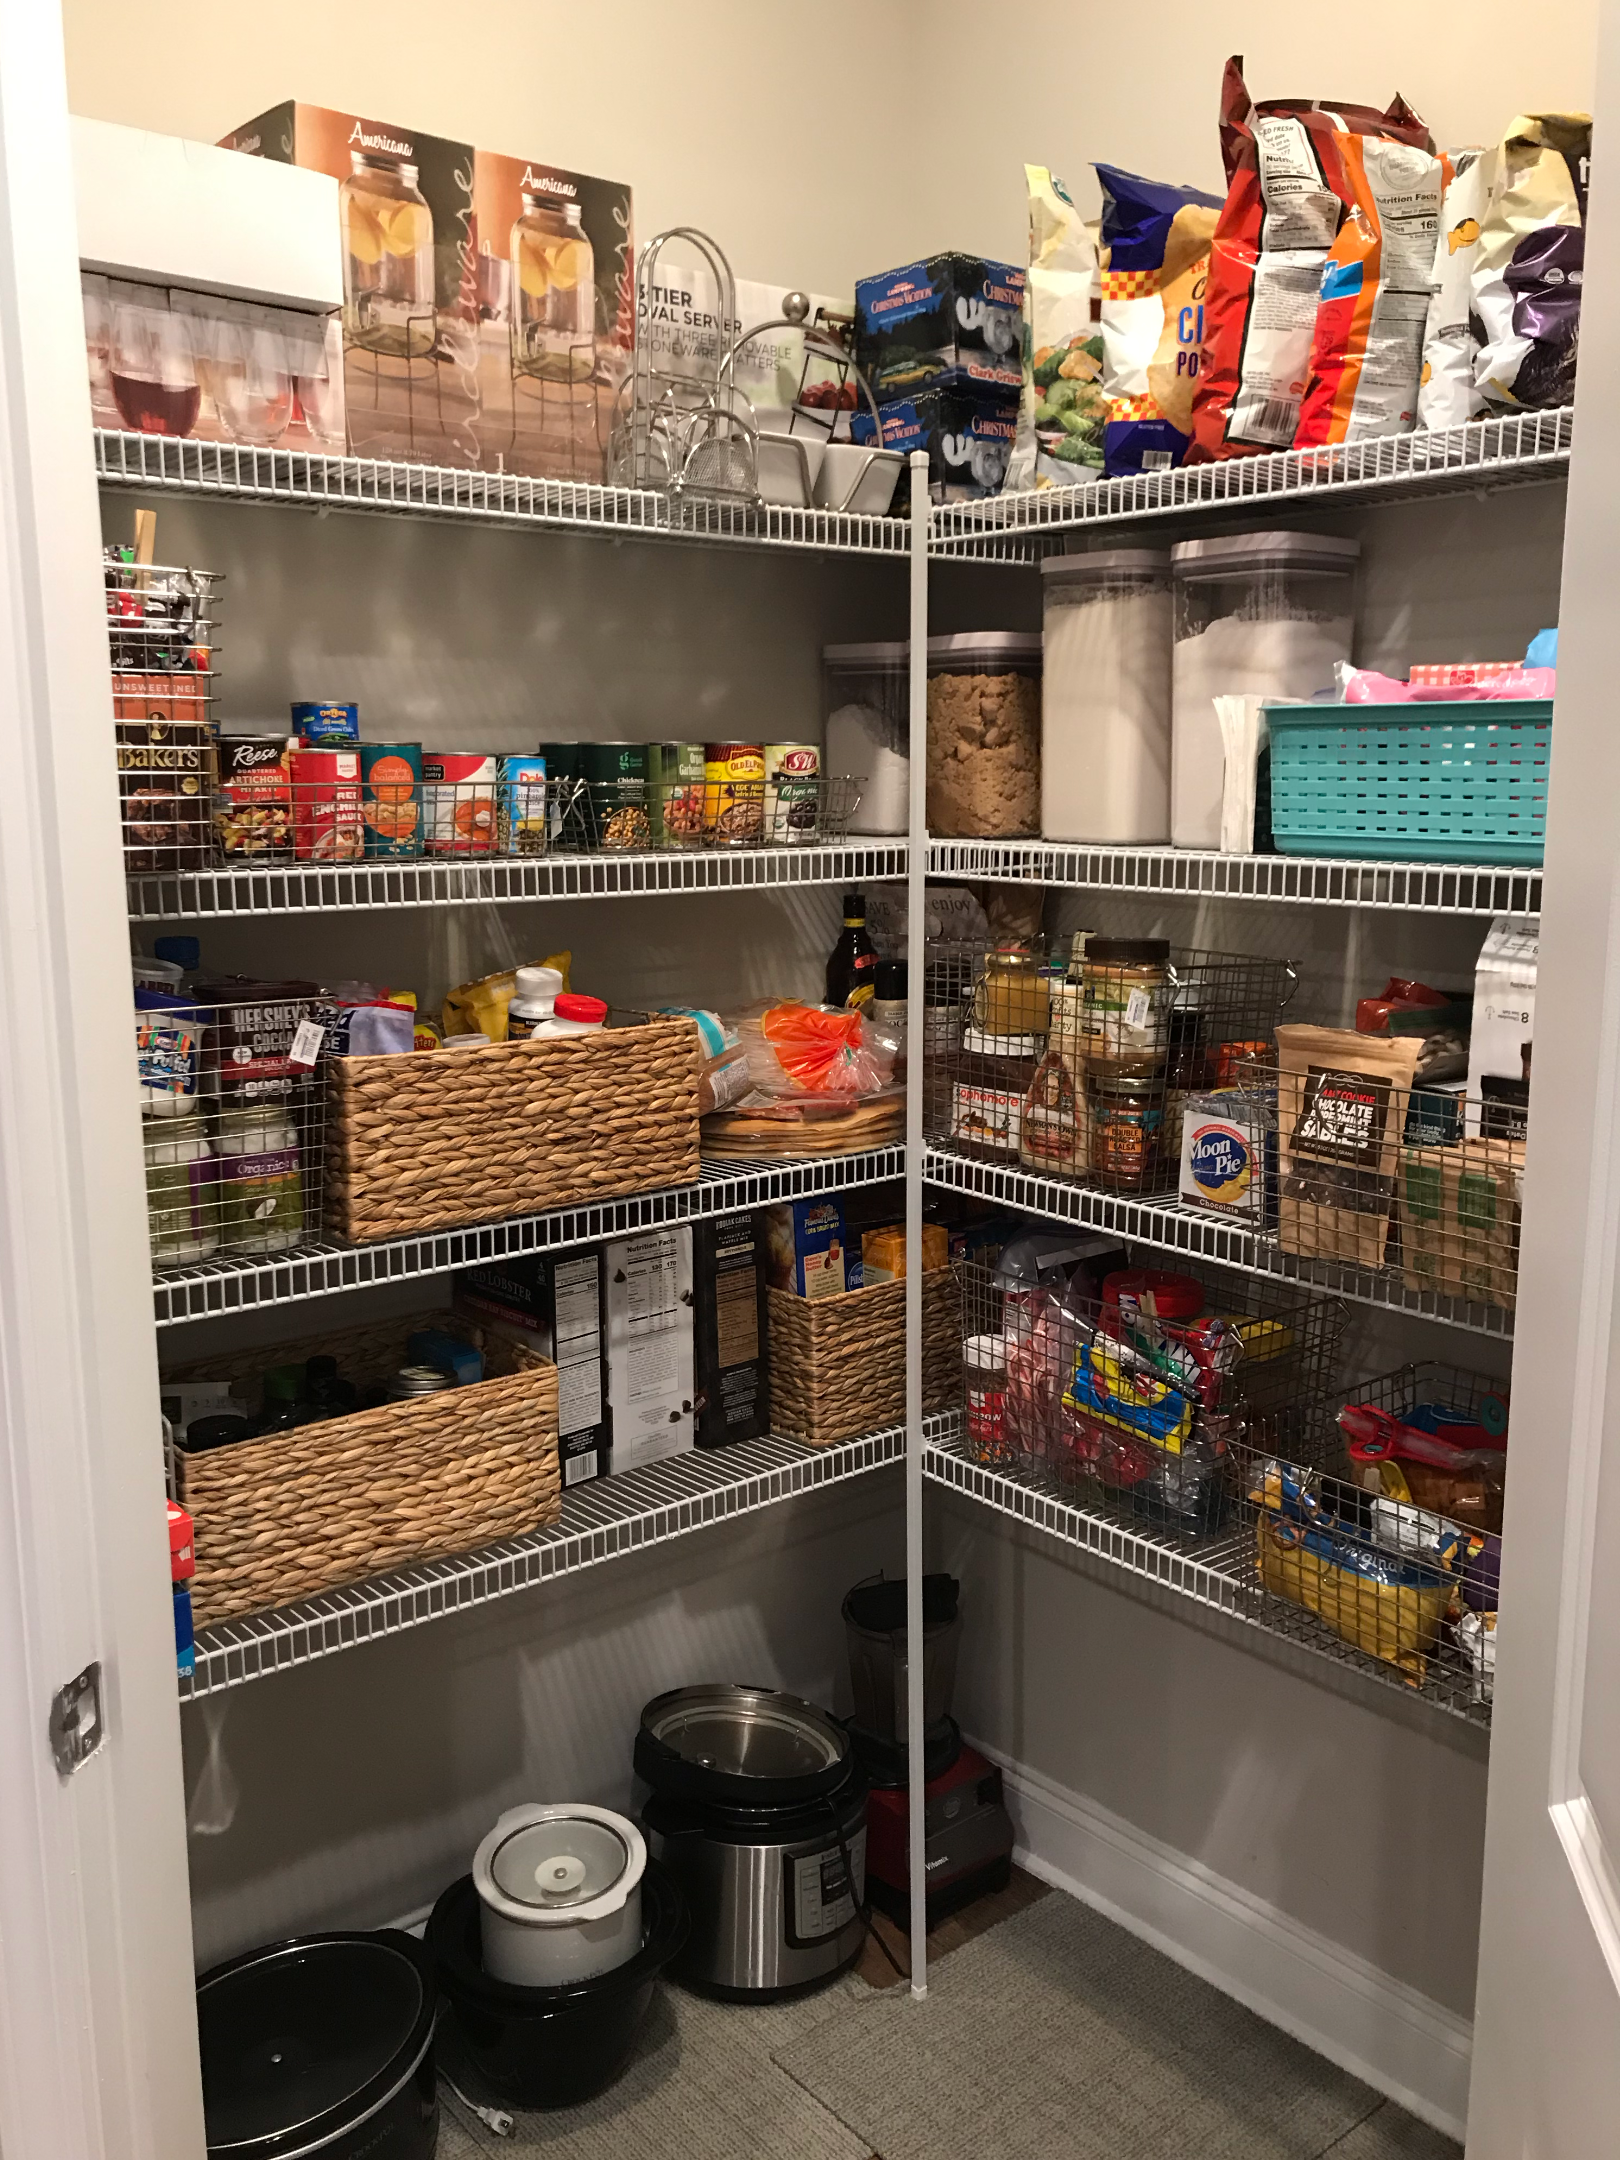


I added some face framing to add dimension and thickness to the lower shelves. See - it already looks a lot less like kindergarten!

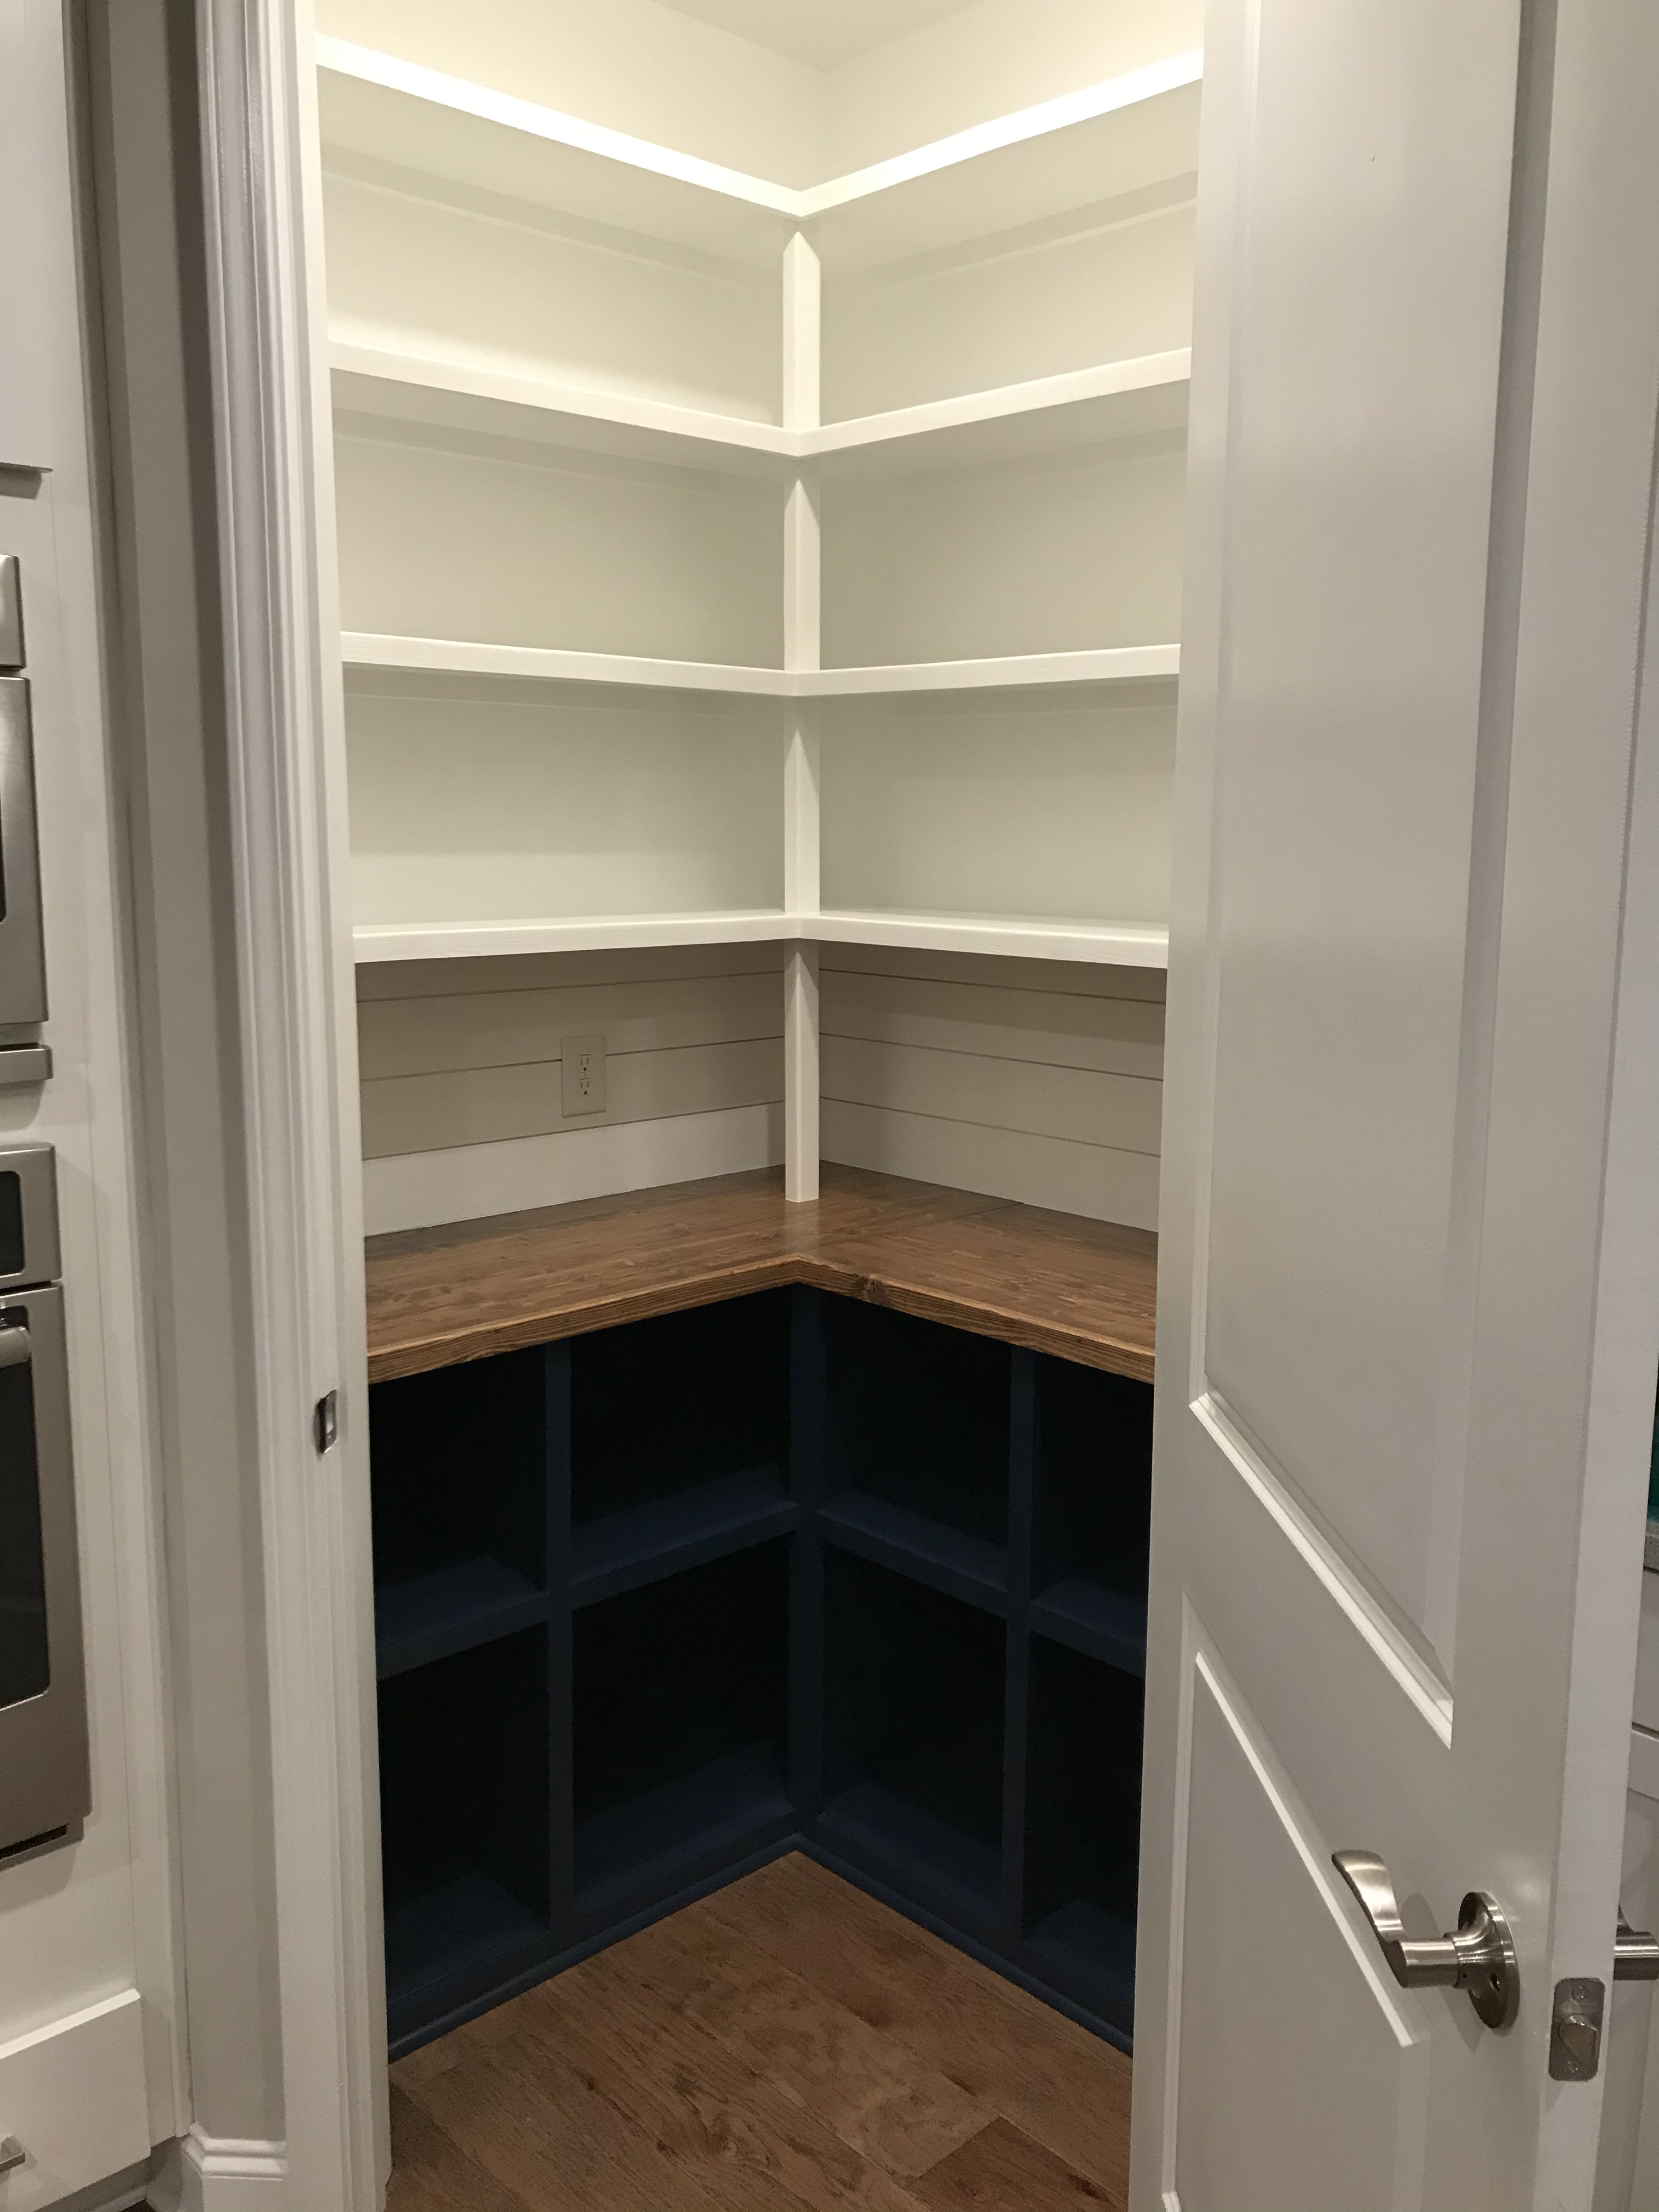
Moving back to the shelving, we have 9' ceilings so opted for four rows of shelves. I used 3/4" thick MDF to create the back support that runs all along the back of the shelves. These are about 1.5" wide.

Note that in our pantry, the wall turns 90 degrees so they
follow that turn to support the ends of the shelves as well.

Now for the shelves themselves. Again I used 3/4" MDF and cut the lengths to fit. You can vary the width of the shelves to your preference. We went with 10.5" because I planned to add a face frame to the shelves. The photo below shows the 'dry fit' test for our shelves to ensure they fit well before moving to the next steps.

Now it's time for primer. Note that when you are using MDF = a couple of coats of primer is a good idea before moving on to your pantry wall color. I moved the tape so I could continue to see where the studs ran.


Because our space is tight, I installed the counter top after painting. I knew it would be difficult to maneuver the countertop once the lowest shelf was in place.

I installed the shelves starting from the top down. Because I wanted a ship-lap feature above the countertop, I added the ship-lap before installing the bottom shelf.

I also installed the face framing to give the shelves a fuller and more professional and finished look. It's amazing how basic MDF can look so nice with a lot of paint and some face framing.


I wanted a support in the corner in the middle of the pantry. I used 2x2 pine. I routered the corners to soften and create a uniform edge. I cut it into individual lengths that fit under one shelf to the next.

The support post appears to be one continuous length "through" each shelf - but it's actually four individual strong supports holding up and strengthening each shelf. The bottom support rests on the countertop.

We love how the redesign turned out!


Here's to your pantry project success!